Hooray for new summer crochet patterns! Today’s pattern features a quick and easy-to-crochet summer tank top in Tunisian crochet.
As always, this is a bespoke garment made to fit you. So you will need to take a few measurements in order to complete this pattern, as there are no stitch counts or specific row counts in this pattern. There is also no sizing chart, so you will need a measuring tape to jot down your personal sizing information.
Yarn: I used Coboo, by Lion Brand Yarns, but you can use any #3 DK yarn of your choice to complete this pattern. I also used a 7 mm Tunisian hook. And yes, you will need a Tunisian hook to complete this pattern.
Let’s get started!
Materials:
Yarn: #3 DK yarn (I used Coboo Yarn, by Lion Brand Yarns)
Hook: 7 mm Tunisian Hook
Additional materials: scissors, measuring tape, stitch markers, and a yarn needle.
Measurements:
Bust: Measure across the apex of your bust along the front side only.
Bust to Hip: Measure from the apex of your bust, to your hip (or wherever
you want the length of your top to end).
Shoulder to Bust: Measure from the top of your shoulder, to the apex
of your bust.
Abbreviations
Ch – Chain SC – Single Crochet
RP – Return Pass KS – Tunisian Knit Stitch
TDC – Tunisian Double Crochet
Get the stitch descriptions and more when you purchase the ad-free PDF pattern! The PDF pattern includes photos, tips, notes, and stitch descriptions for the stitch abbreviations.
-
 Summer Tank Top$ 5.00
Front Panel
Make a chain that measures your Bust measurement. Chain an even number of stitches.
Foundation Row: Beginning on the second chain from your hook, insert your hook into the stitch, yarn over, and pull up a loop. Leave the loop on your hook. Repeat with every stitch of the chain. You should end up with one loop on your hook for every stitch you chained.
Complete a RP.
Row 1: Beginning on the second vertical stitch from your hook, KS into every stitch of the row.
Complete a RP.
Row 2: Beginning on the second vertical stitch from your hook, TDC into every stitch of the row.
Complete a RP.
Repeat Rows 1 & 2 until you have a fabric that measures your Bust to Hip by your Bust measurement. The last row of your fabric will need to end after completing a repetition of Row 2.
Triangles: For this next part, we’ll crochet the top of the shirt. You’ll need your Shoulder to Bust measurement.
Each Triangle is created by decreasing in the first and last stitch of every row.
Fold your fabric in half, vertically, and place a stitch marker on the fold to mark the “center stitch”. Unfold your work. Make sure to count the vertical stitches in each half and adjust the stitch marker if necessary.
Row 1: Insert your hook behind the top loop (leg) of the second vertical stitch (like you would for a Tunisian Simple Stitch), then insert your hook between the two loops (legs) the next stitch (like you would a KS). Yarn over, and pull through both stitches so that you cast one loop onto your hook. At this point, you should only have two loops on your hook. KS into all but the last two vertical stitches before the stitch marker.
In the second-to-last stitch, insert your hook behind the top loop, then immediately insert the hook between the two loops of the next stitch. Yarn over, and cast on one loop.
Insert your hook into the chain space (or stitch) where you placed the center stitch marker, and cast on one loop.
Complete a RP.
Row 2: Yarn over and insert hook behind both loops (legs) of the second and third vertical stitch of the row (so you have all four loops on your hook). Yarn over and cast on a loop. You should have 2 loops on your hook at this point. TDC into all but the last two vertical stitches of the row.
In the last two stitches of the row, yarn over and insert your hook behind both loops of the
second-to-last, and the last stitch (so you have all four loops on your hook). Yarn over, and cast on a loop.
Cast on a loop in the final stitch of the row (the stitch right after the last vertical stitch of the row).
Complete a RP.
Repeat Rows 1 & 2 until your sides decrease and create a triangle. Stop decreasing when you can cast on only 3 loops onto your hook.
Strap: KS into the vertical stitch, then cast on a loop into the final stitch of the row. Complete a RP.
Repeat 4 more times so you have a short strap then bind off.
SC Bind off: Insert your hook between the two loops of the vertical stitch, yarn over, and pull up a loop. Yarn over, and pull through both loops on your hook, so you are left with one loop. Repeat in the next stitch.
For your second triangle, you’ll be repeating the same process as the triangle above. Insert your hook into the same stitch as the stitch marker to cast on your first first loop. Then begin on Row 1 of the Triangle
-
 Summer Poncho, Tunisian Crochet PDF Pattern$ 3.00
 -
 The Gentleman’s Sweater, Tunisian Crochet PDF Pattern$ 5.00
 -
 Boat Neck Top, Tunisian Crochet$ 6.00
 -
 Breezy Top, Tunisian Crochet$ 6.00
 -
 Thursday Night Cover Up$ 5.00
 -
 Drawstring Bag, Tunisian Crochet$ 4.00
 -
 Rectangular Shawl PDF Pattern$ 4.00
 -
 Spring Triangle Scarf$ 4.00
 -
 Yarn Craft Journal,100 Lined Pages(paperback journal)$ 9.95
Back Panel
Complete a second piece of fabric that measures the Bust to Hip measurement by the Bust measurement (Page 2 of the pattern, “Front Panel”).
Back Triangles: For this panel, we’re going to crochet two smaller triangles (similar to what we did in the front panel), and longer straps than the Front Panel.
Once you complete your fabric, fold it in half, vertically, and place a stitch marker in the center stitch. Count your stitches, and adjust your stitch marker as needed to ensure it is placed in the center stitch.
Fold your fabric so that you have a trifold in one of the fabric halves. Fold into thirds, so that the center stitch marker, is in the center of the first half, then fold the end (the corner closest to your hook) towards the center of the half to meet the center stitch marker. Place a stitch marker in the folds along the left and right side of the fabric.
First Triangle: Beginning on the second vertical stitch from your hook, SC Bind Off into each stitch until you reach the first stitch marker.
When you reach the stitch marker, you should only have one loop on your hook. You’re going to cast on a row of KS until you reach the second stitch marker:
Begin Row 1 of the triangle (“Triangles”, page 3, Row 1). Then complete a full triangle by crocheting repetitions of Row 1 and 2 of page 3. For the Strap, crochet 10 rows (or as many rows as you need so that the triangle and strap measure the Shoulder to Bust measurement). Do not weave in the yarn ends!
Second Triangle: Insert your hook into the same stitch as the second stitch marker, and cast on one loop. Complete a SC Bind Off until you reach the center stitch marker, then continue until you reach the first stitch marker of the second triangle.
Repeat the same steps as in the First Triangle so that you end up with two matching triangles.
Finish the row by completing a SC Bind Off in the remaining stitches following the second stitch marker, of the second triangle.
Sewing
Try on your top before sewing it together. Use safety pins, or stitch markers to pin the shirt together, leaving a few inches at the bottom of the top un-pinned. Adjust the stitch markers along the shoulders and the bottom of the shirt, as necessary, to reach your desired fit.
Once you’ve adjusted your pins, take off the tank top, and adjust the number of rows on the straps (if necessary). Replace the bind off row at the top of the straps, if you removed any of the rows on your strap.
Flip your tank top, inside-out, and sew along the top of each strap, joining the back and front strap together. Then line up the RP stitches between the Front and Back panels. Beginning from the top of the tank top, sew along the side, and into the RP stitches.
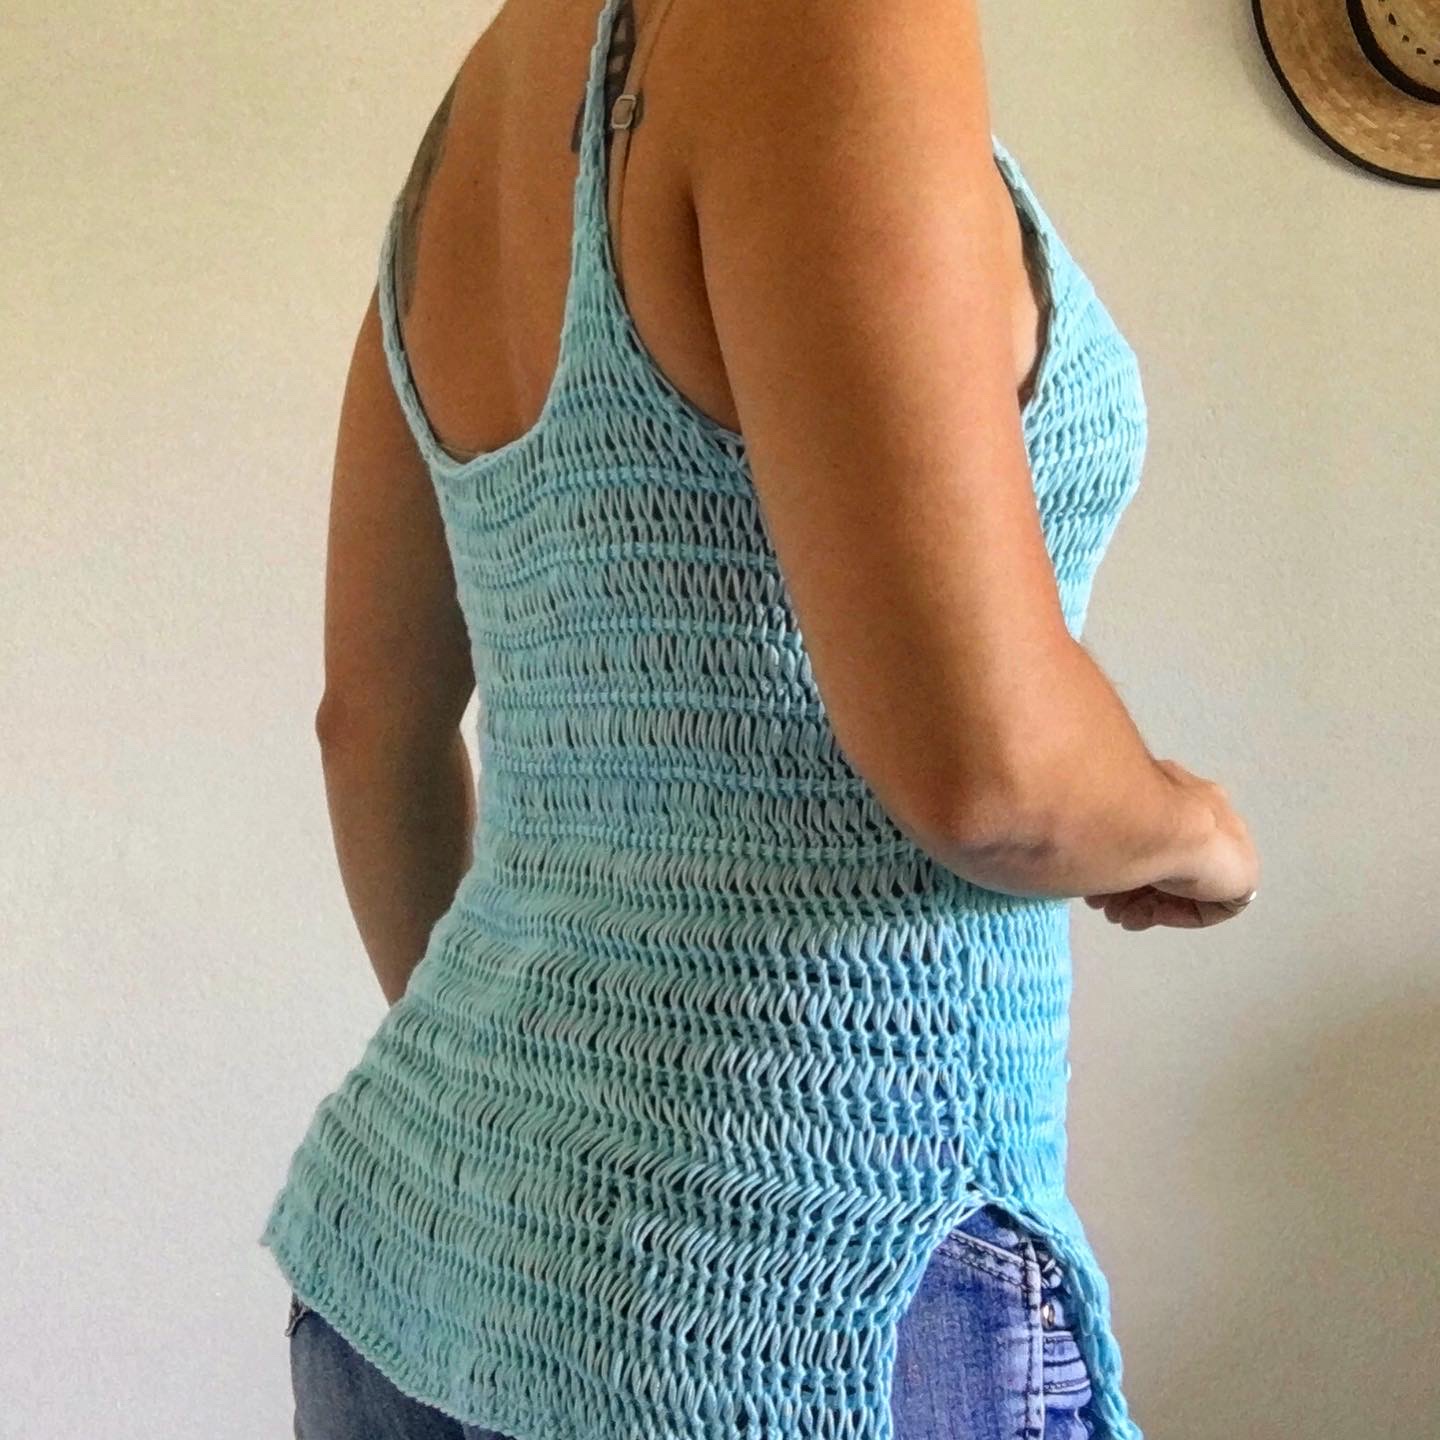
Leave 3 to 4 inches (7.6 to 10 cm) of fabric unstitched along the bottom of the top, to create a small split at the bottom of the tank top, for a nicer fit.
Sew along the other side of your shirt, and cut your yarn. Weave in all of your ends, and you are done!
To block: Wet the shirt thoroughly, and without ringing out the water, hang it on a hanger in your shower. Using two hands, pull on the shirt lightly to stretch out and line up the stitches the way you want them to look. Then just allow the shirt to air dry.
If you used Coboo yarn, you can machine wash and dry your shirt. To machine wash, I throw my shirt into a delicates bag to keep the stitches from getting caught on anything. While you can machine dry the shirt, I normally just hang mine and allow it to air dry. That helps keep the stitching looking nice.
For questions or comments on this pattern, please contact Atenas at: atenas@modebespoke.com
Disclosures & Copyright
The photos and content on this pattern belong to Mode Bespoke, unless otherwise stated. All rights reserved.
If you are selling your work from my patterns, please credit Mode Bespoke for the pattern and provide a link to this pattern on your work. You may not use my written work, photos, or any other content posted on my blog, YouTube, Instagram, or other sites as your own or display them for public use. Please do not distribute purchased patterns, they are intended for personal use.
I work very hard to create, edit, and share my patterns, I ask you to please be respectful of my work.
Leave a Reply