Normally, this is about the time when we start to think about farmer’s markets and produce vendors setting up shop. Markets start to pop up towards the middle and end of April, and we all get to enjoy fresh fruits and veggies. With the current state of things, we may or may not get to visit farmer’s markets for a little while. BUT, we also get some time to build up our reusable bag stash for when the markets DO open.
These bags are very easy to make, and they are suuuper stretchy! I made 2 different sizes. One is for small items, like limes or ginger, etc. The large bag can hold oranges, apples, you know, the larger stuff.
A note on the yarn:
In order to make these as light as possible, you will need to work with either crochet thread, or a fingering yarn. The thicker the yarn, the heavier your bag will be. If you have never used a fingering yarn, or a size 10 crochet thread, you may want to start with a size 3.
Size 10, size 3????
Crochet thread has some wonky sizing. The larger the number, the thinner the thread. So a size 10 is much thinner than a size 3. If you are new to the world of crochet thread, bigger is better. It will not add a significant amount of weight to your bag, but it will make crocheting these bags much easier.
Yarn: crochet thread
Hook: 2 mm
Additional materials: Stitch Marker, Scissors, Measuring Tape, Yarn or Tapestry needle.
Sizing:
Small bag measures approximately 6.25 by 6.75 inches (15.8 by 17 cm)
Large Bag measures approximately 8 x 8 inches (20 x 20 cm)
You can easily customize the size to suit your needs.
This pattern is worked in multiples of 4.
Chain 40 (small bag) or 60 (large bag)
Row 1: Chain 5, Single crochet (sc) in the 6th stitch from your hook. Chain 5, skip 3, sc into the next stitch. Chain 5, skip 3, sc into the next stitch Repeat until you reach the end of the row. At the end of the row, you will be left with 3 stitches, sc into the last (3rd) chain.
Row 2: CH 5, turn your work so that the loops you just made are at the bottom (closest to you), and the chain is on top. SC into the same stitch as the sc from the previous row. As seen in the photo below:
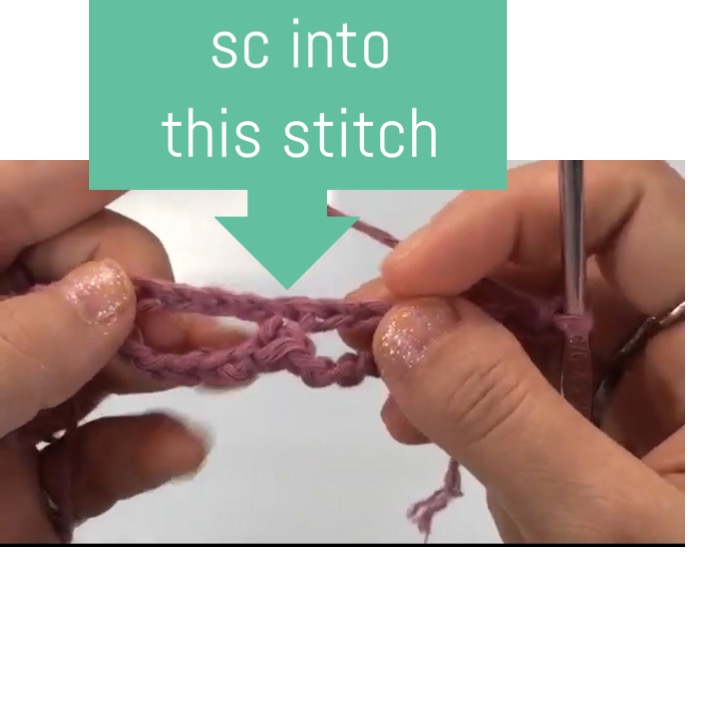
Row 2 (continued): Repeat the chain 5, skip 3 pattern until you reach the end of the row.
At the end of the row, you’ll reach a small chain circle. SC into the center of the chain circle.
Rounds: From this point on, you will chain 5 and sc into the middle of the chain spaces made by the chain 5 of the previous rows.
After a few rows, you’ll notice the bag will start to close up (and actually begin to look like a bag).
Once you’ve crocheted the length you want for your bag, you’ll need to complete a row of single crochets.
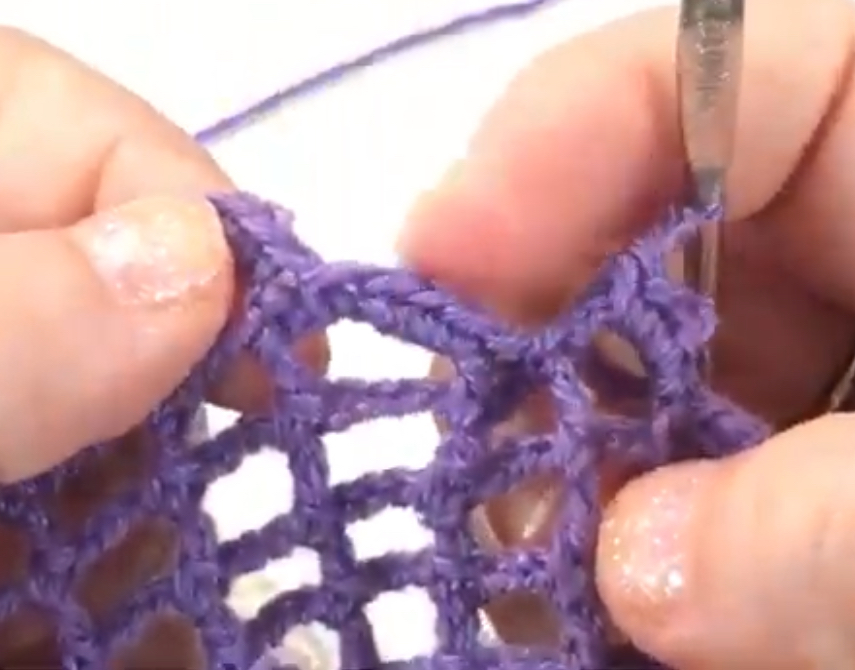
Final row:
Sc 5 stitches into the chain space of each stitch all the way around the bag. As seen below:
When you are finished, weave in your ends. Thread a piece of thicker yarn through the top row of the bag to use as a tie.


Disclosures & Copyright
The photos and content on this pattern belong to Mode Bespoke, unless otherwise stated. All rights reserved.
If you are selling your work from my patterns, please credit Mode Bespoke for the pattern and provide a link to this pattern on your work. You may not use my written work, photos, or any other content posted on my blog, YouTube, Instagram, or other sites as your own or display them for public use. Please do not distribute purchased patterns, they are intended for personal use.
I work very hard to create, edit, and share my patterns, I ask you to please be respectful of my work.
Leave a Reply